

Scroll to the very bottom of almost any website and you will find the footer. It is quiet, easy to forget and surprisingly important. It is where visitors look for your phone number, your address, your social links and the small print. A footer that still says "Lorem ipsum" or a copyright from three years ago tells people the site is not looked after.
The good news: you can fix all of it in a few minutes, with no code. Let's take the popular theme Garnet as an example. The same ideas apply to most themes that have a footer settings page.
What is in a footer?
Here is the Garnet footer from our demo site. It has five parts you can change:
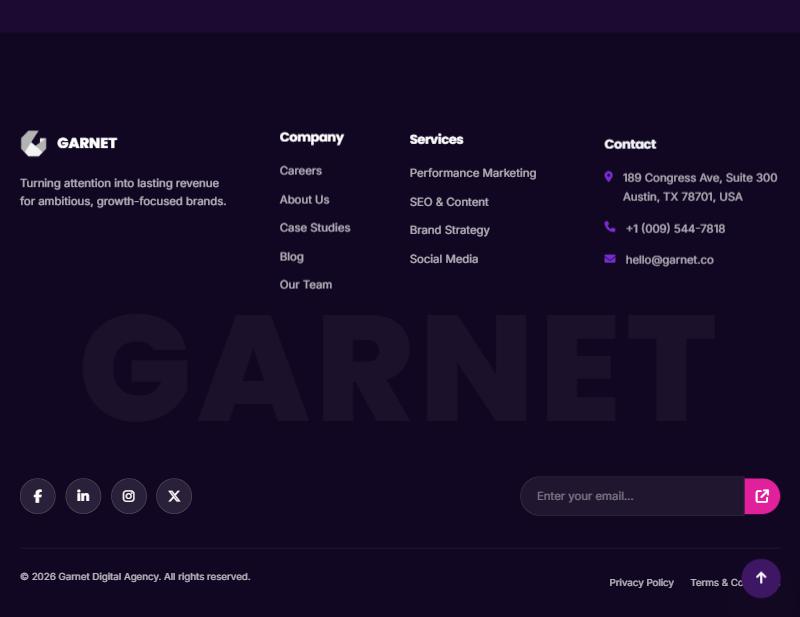
- The brand column: your logo and a short description.
- Two link columns, such as Company and Services.
- Contact details: address, phone and email.
- Social icons and a newsletter sign-up form.
- The bottom row: copyright text and links to your privacy policy and terms.
Step 1: Open the footer settings
- In your WordPress dashboard, go to Appearance → Theme Options.
- Click the Footer Settings tab on the left.
Everything on that tab is explained below. When you finish, click Save Changes at the bottom. Your changes appear on the site straight away.
Step 2: Choose what to show
At the top are four switches. Turn off anything you do not need.
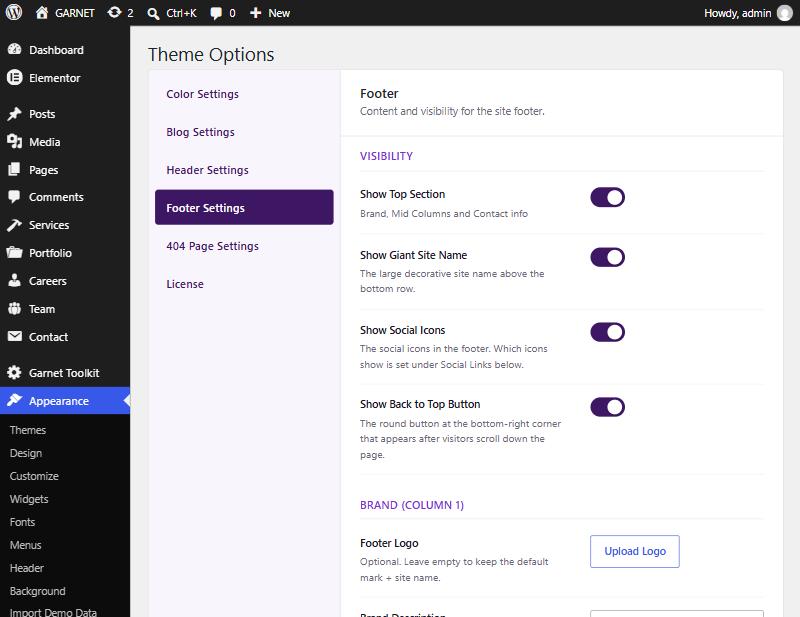
- Show Top Section controls the brand, link and contact columns.
- Show Giant Site Name is the big decorative text behind the columns.
- Show Social Icons turns the social row on or off.
- Show Back to Top Button is the round arrow that appears as visitors scroll.
Just below the switches you can upload a Footer Logo and write a short Brand Description. If you leave the logo empty, the theme shows its default mark with your site name.
Step 3: Edit the link columns
The links in the two middle columns are not typed into the footer settings. They come from menus, so you manage them the same way as any other menu.
- Rename the two column headings on the Footer Settings tab, under Mid Columns.
- Go to Appearance → Menus and open the Manage Locations tab.
- Pick a menu for Footer Column 2 and another for Footer Column 3, then click Save Changes.
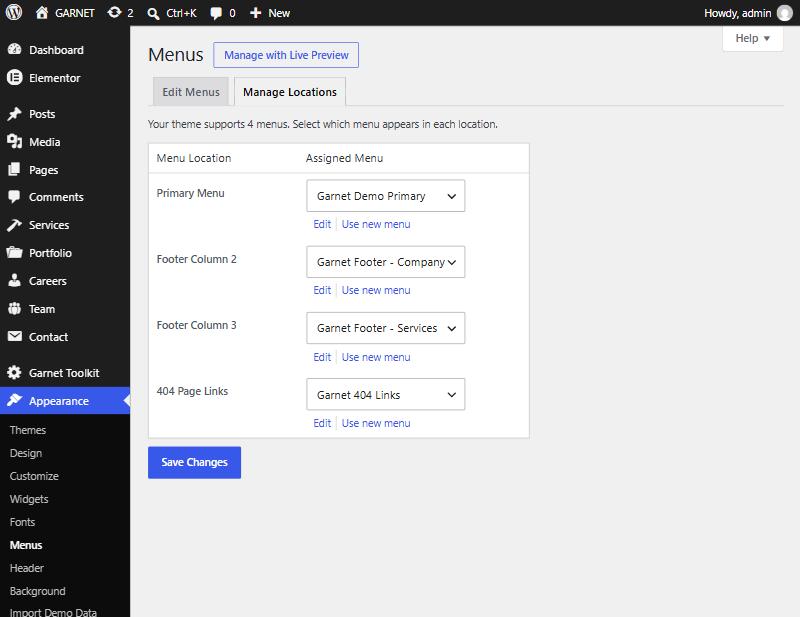
- To add, remove or reorder links, open the Edit Menus tab, choose the menu and drag its items.
Step 4: Update your contact details and social links
Back on the Footer Settings tab, scroll to Contact Info and Social Links.
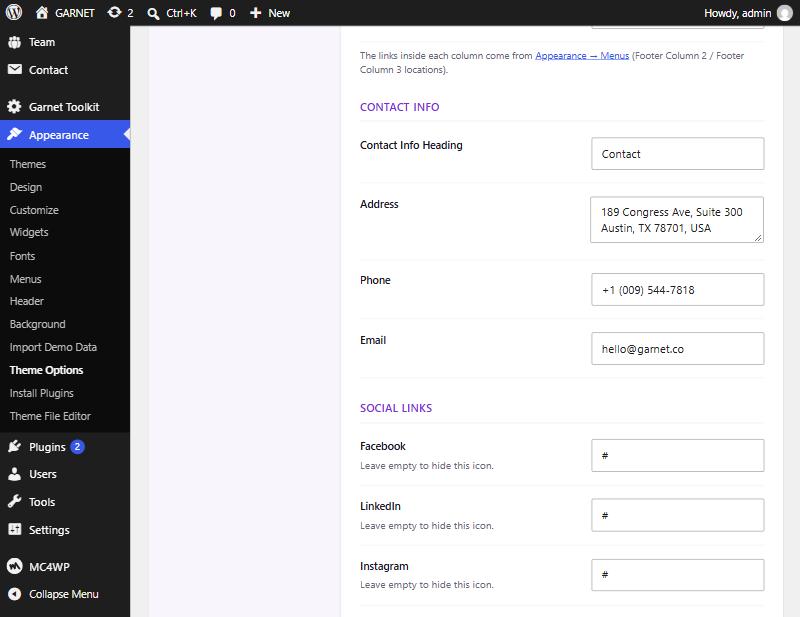
- Replace the demo Address, Phone and Email with your own.
- Paste the full web address of each social profile, for example
https://www.linkedin.com/company/your-name. - Leave a field empty to hide it. That is the easy way to remove a social icon or a phone number you do not want to show.
Tip: the demo uses "#" as a placeholder web address. A "#" link goes nowhere, so replace it with a real address or clear the field.
Step 5: Fix the copyright line and legal links
Scroll down to Legal & Copyright.
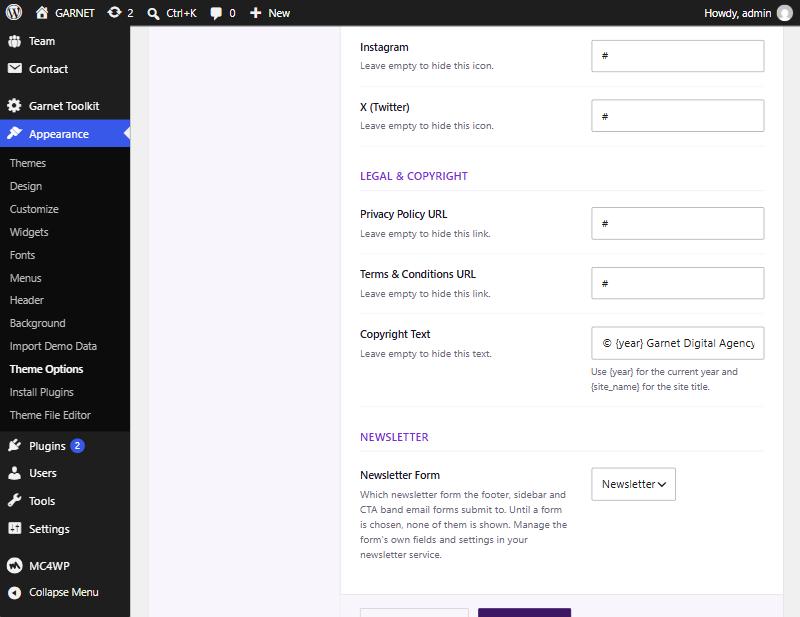
- Enter the addresses of your Privacy Policy and Terms & Conditions pages. Clear a field to hide that link.
- Write your Copyright Text. Use
{year}for the current year and{site_name}for your site title, for example© {year} {site_name}. All rights reserved.
With {year} in place the year updates itself every January, so you never have to touch this line again.
Step 6: Connect the newsletter form
The newsletter box in the footer stays hidden until you choose a form. Under Newsletter, pick a form from the Newsletter Form list. These forms come from the Mailchimp for WP plugin, so create one there first if the list is empty. The same form is used by the blog sidebar and call-to-action newsletter boxes, so you only set it up once.
Step 7: Save and check
- Click Save Changes.
- Open your site in a new tab and scroll to the bottom.
- Click each link, and check the phone number and email on a phone too.
If something does not look right
| What you see | Likely cause and fix |
|---|---|
| Your change is not on the site | You did not click Save Changes, or a cache is showing the old page. Save again, clear your caching plugin and refresh with Ctrl+F5. |
| A footer column is empty | No menu is assigned to it. Assign one under Appearance → Menus → Manage Locations. |
| A social icon or contact line is missing | Its field is empty, and empty fields are hidden on purpose. Fill it in. |
| The newsletter form is not shown | No form is chosen. Create one in Mailchimp for WP and select it under Newsletter. |
| The copyright shows {year} as text | Check the spelling. It must be exactly {year} in curly brackets, with no spaces. |
| The whole footer is gone | Show Top Section is switched off. Turn it back on. |
Still stuck? We are here to help
If the footer still does not behave, open a support ticket. Tell us what you changed, what you expected and what you see, and add a screenshot. The more detail you share, the faster we can help.