

Picture this: you have just installed a brand-new WordPress theme and opened your site. It is empty. No pages, no menu, no images, only a plain "Hello world" post. Now imagine the exact website you saw on the theme's preview page, with every page, picture and menu in place, appearing on your own site while you make a cup of tea.
That is what a demo import does. Let's take the popular theme Garnet as an example and walk through how it works, what you need before you start, and what to do once it finishes. The same ideas apply to almost any theme that offers a one-click demo.
So what exactly is a demo import?
Think of a show home. The builder has already chosen the furniture, hung the pictures and painted the walls. A demo import copies that finished look into your own home, and then you swap in your own things.
A theme demo is a complete sample website. When you import it, WordPress adds the sample content to your site:
- Pages such as Home, About, Services, Contact and the rest of the layouts the theme offers.
- Blog posts, services, portfolio items, team members and other content types.
- Images and media that the sample pages use.
- Menus, set up in the right places in the header and footer.
- Widgets and theme settings, such as the blog sidebar and the footer.
- The front page, so your site opens on the demo's home page.
The big win is not saving typing. It is seeing how the theme is meant to be built, then editing real examples instead of starting from nothing.
Step 1: Pick your starting point
Garnet ships with several home page designs, and you choose one when you import. Here are three of them.
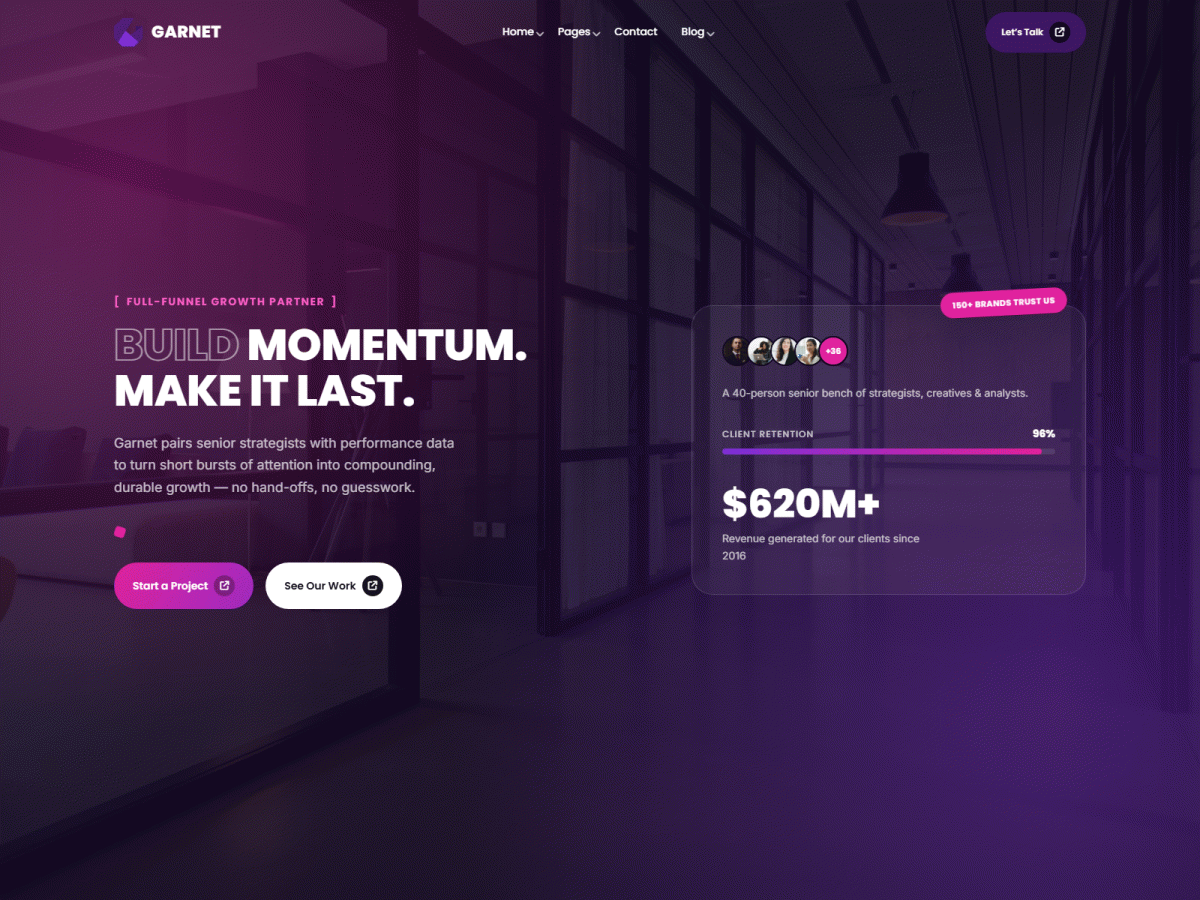
Default Home is a bold, dark hero with a headline and a key-numbers card.
Video Home opens with a centred headline over a photo, with a client logo strip below.

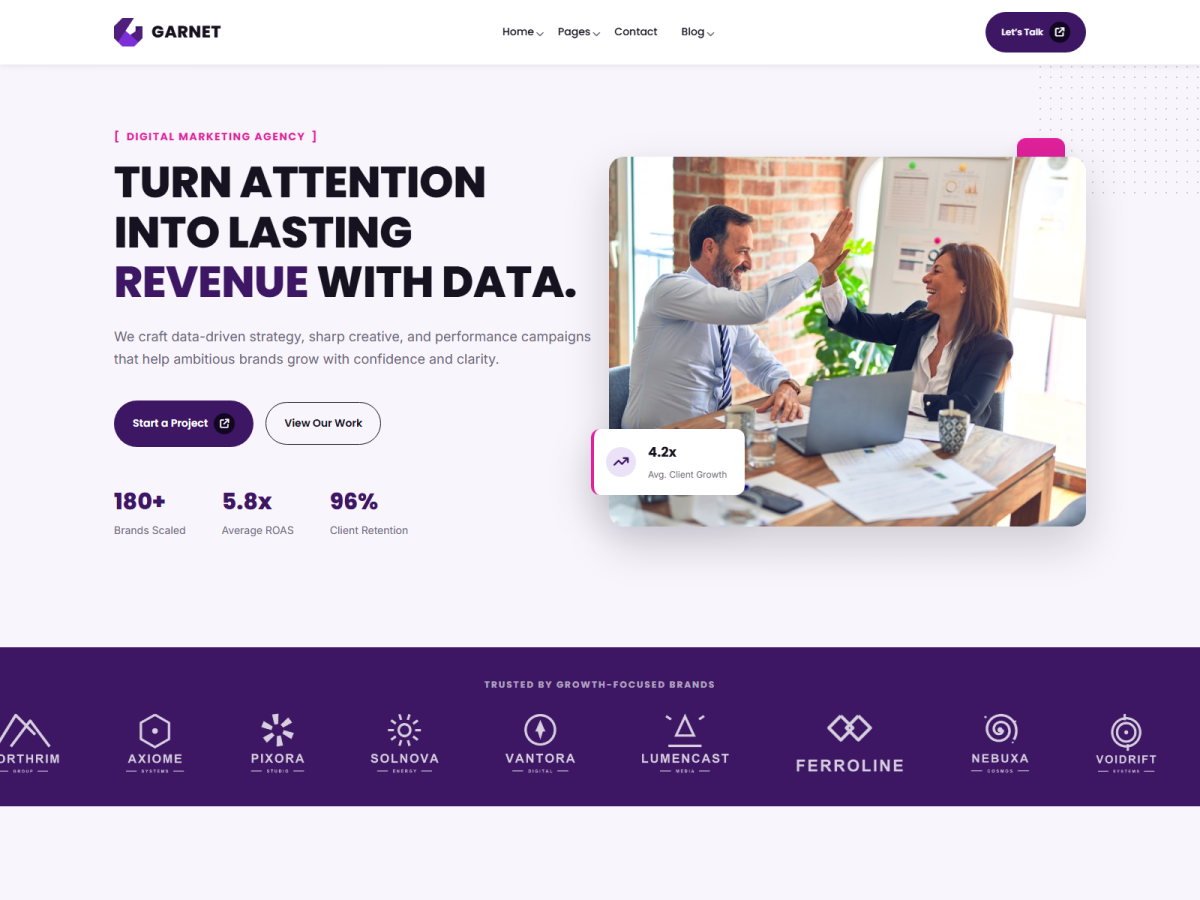
Basic Home is the light, clean option with a photo on the right.
Garnet also has a "Preview Version" that loads all the home pages at once. It is great for browsing every layout, but it is not meant for a live site. For a real project, pick the one home page you like best.
Step 2: Get ready (five minutes that save an hour)
Most demo import problems come from skipping this part. Before you click anything, check these:
- Start with a fresh site. A new WordPress install is ideal. The importer adds content and does not delete what is already there, so importing into a busy site can leave you with a mix of old and new pages.
- Use a supported setup. Garnet needs WordPress 6.4 or newer and PHP 7.4 or newer.
- Install and activate the theme you bought.
- Install the recommended plugins. After you activate Garnet, WordPress shows a notice with a "Begin installing plugins" link. Follow it and activate Garnet Toolkit, Elementor, Contact Form 7 and One Click Demo Import. The demo pages are built with Elementor and Garnet Toolkit, so they only display fully while both are active.
- Check your server limits. The import moves a lot of data and pictures, so your hosting should allow at least these values. If you are not sure, ask your host, as they can change these for you in a minute.
memory_limitof 256M or moremax_execution_timeof 300 seconds or moreupload_max_filesizeandpost_max_sizeof 64M or more
Tip: make a backup first if the site holds anything you care about. It takes a minute and gives you an easy way back.
Step 3: Run the import
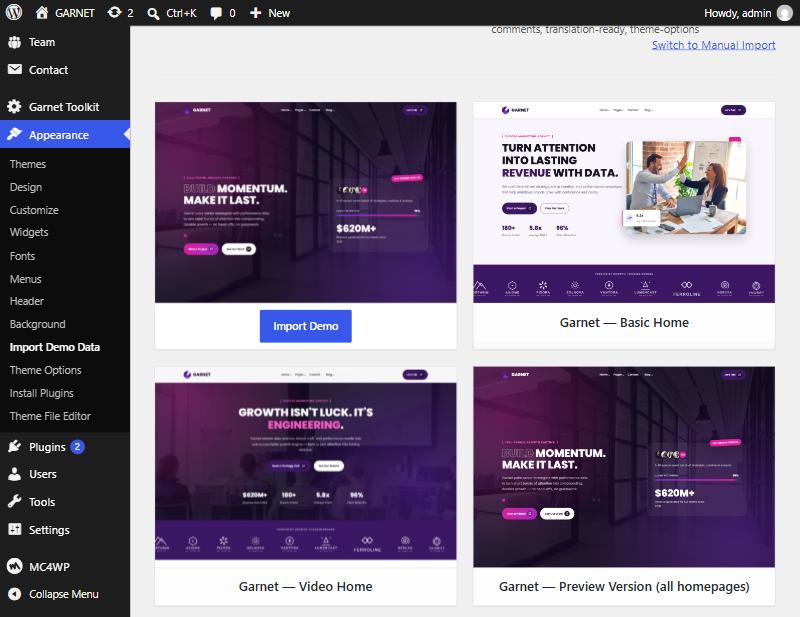
- In your WordPress dashboard, go to Appearance → Import Demo Data.
- You will see the demos as a gallery. Point at the one you want and click the Import Demo button that appears.
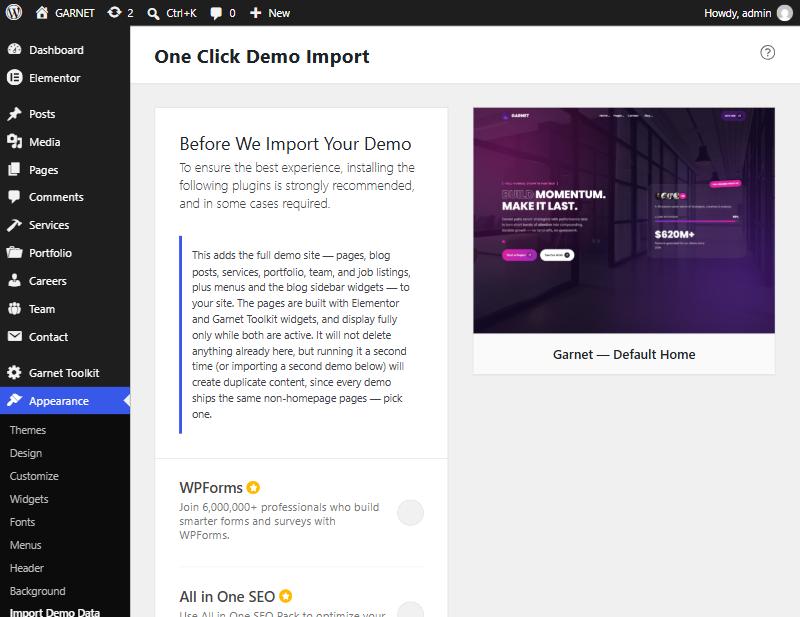
- A "Before We Import Your Demo" screen appears. It suggests a few extra plugins from the import tool's makers. They are optional and not needed for Garnet, so you can ignore them. If you picked the wrong demo, click Go Back. Otherwise click Continue & Import.
- Wait. Keep the tab open until you see Import Complete!. It can take a few minutes because the importer downloads and adds all the pictures. The finished screen has buttons to open Theme Settings or Visit Site.
The most important rule: run the import once. If you click it a second time, or add a second demo on top, you will get duplicate pages and posts. If something goes wrong, fix the cause first (usually a server limit) and start again from a clean site.
Step 4: Make it yours
When the import finishes, visit your site. It should now look like the demo. Next, turn the sample into your own:
- Edit the pages with Elementor. Click any text, image or button and replace it with your own.
- Swap the logo and colors under Appearance → Customize.
- Review the menus under Appearance → Menus and remove any page you will not use.
- Delete the sample content you do not need: demo blog posts, team members, portfolio items and unused images.
- Replace the demo pictures. They are placeholders. Use your own photos, or licensed ones, on a live site.
If something does not look right
| What you see | Likely cause and fix |
|---|---|
| The import stops partway or times out | A server limit is too low. Raise the memory, time and upload values above, then retry on a clean site. |
| Pages look plain or broken | Elementor or Garnet Toolkit is not active. Activate both under Plugins. |
| Some images are missing | The download was interrupted. Check that your hosting can reach other websites, then ask your host about timeouts. |
| You see two of everything | The import ran twice. Delete the duplicates, or reset the site and import once. |
| The menu is empty | Check Appearance → Menus and make sure a menu is assigned to the primary location. |
Still stuck? We are here to help
If you have tried the fixes above and the import still fails, open a support ticket. Tell us which demo you chose, what you saw and when it stopped, and add a screenshot of any error. The more detail you share, the faster we can sort it out.